In this tutorial we walk through creating new locations for your organization's THERMS account.
This tutorial assumes your Organization's account has the Locations module activated in the Admin module settings
A pro-tip for new organizations - it's a good idea to setup a "dummy location" in your account for testing and training your team. Name the Location something like "Training Location"
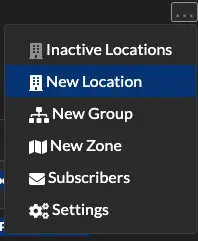
Navigate to the "Locations" page from the main menu then select "New Location" in the top right menu dropdown.
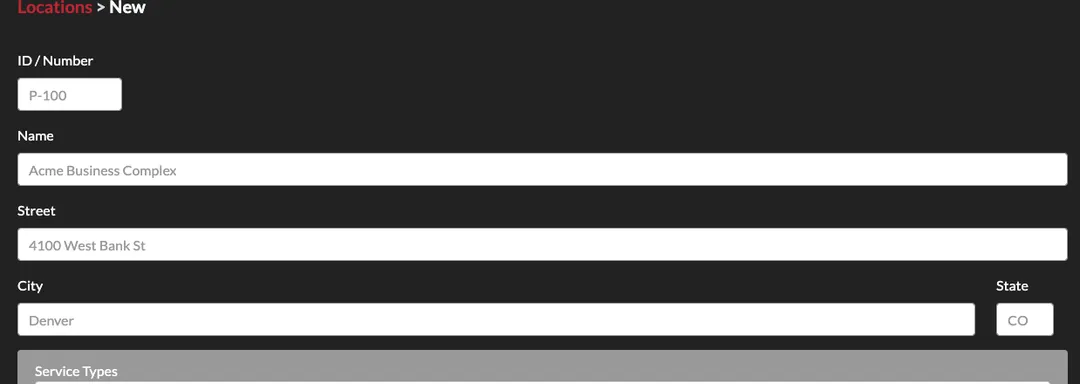
Enter the Location information in the text fields. The "ID / Number" is optional and can be used in any format your organization assigns unique ID's to Locations. If you don't have a format already, it is common to increment them with a letter prefix that designates the type of Location, ie: "B-100" where "B" represents a business, "APT-100" where "APT" represents apartments Location, etc.. The numbers assigned can be anything but it is recommended to increment them by 5's, ie: "B-100", "B-105",... "APT-100", "APT-105", etc..
If the Location has an address entered then THERMS will attempt to provide map information based on this address.
Next, if your Organization has Service Types entered in the "Admin > Settings > Service Types" page, you'll be able to specify them in the Service Types dropdown for this particular location.
In order to see Service Types in Locations you must activate the setting "Enable Service Types" by navigating to Locations then selecting "Settings" from the dropdown menu in the top right.
If your Organization has Location Groups activated, you can enter any groups that apply to the new Location being created. Location Groups are useful for categorizing Locations into related groups.
In order to see Location Groups in Locations you must activate the setting "Enable Location Groups" by navigating to Locations then selecting "Settings" from the dropdown menu in the top right.
If your Organization or Region has "Geographic Zones" option activated then you'll be able to select a "Zone" for the new Location. When a Zone is selected this Location will be displayed in the Zones Map in the outlined area.
The last field is the file upload field - you can upload an image to be displayed with the Location.

When you're finished with all fields, click/select "Save". The new Location has been created.
Location Email Subscribers
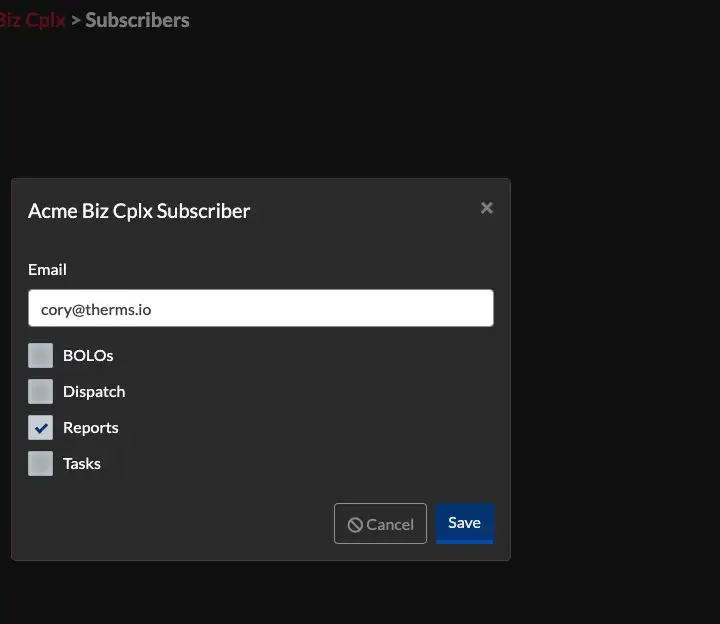
After creating a Location you may need to add Subscribers. A Location Subscriber can be subscribed to information such as BOLOs, Dispatch, Reports and Tasks that are assigned to the particular Location.
For example, if you want to receive an email for every Report that's created under this Location then you'll add your email address under Location Subscribers.
There are 2 different paths to access Location Subscribers.
- Navigate to Locations then select "Subscribers" from the dropdown menu in the top right.
- Navigate to a specific Location's page then select "Subscribers" from the dropdown menu in the top right.
From here you can create a new Location Subscriber and select what content they should be subscribed to. This Subscriber will receive an email for all content you select.